Do you know one of the most popular features of Moodle that is loved by our users is the platform’s flexibility?
There are other advantages to using Moodle as your learning platform of course, which you can read in our recent Wonder Wednesday post.
Now, Moodle’s flexibility really does put you in the driving seat. To begin your flexible Moodle journey, we do recommend that you master the dashboard!
So, this #FeatureFriday we’ll show you how.
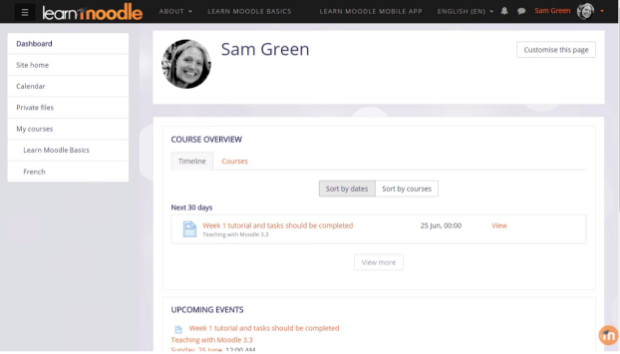
Everyone in Moodle has their own personal page, referred to as a dashboard.
On many Moodle sites, users will be taken to the dashboard after logging in or it can be accessed by clicking the user menu in the nav draw.
Put simply, the dashboard is a page where you have an overview of the courses that you’re enrolled in and any activities which need to be given attention to.
For example, in the image below the learner must complete ‘Week 1 tutorial and tasks’.
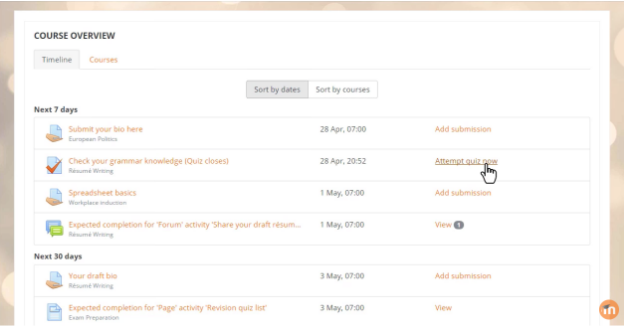
Clicking the course tab will display which course you are enrolled in and how much of the course has been completed.
Users can choose to sort their timeline by the date the activity is due, with the soonest at the top, or by course.
Links to the activities are included in the timeline so learners can access them at the touch of a button.
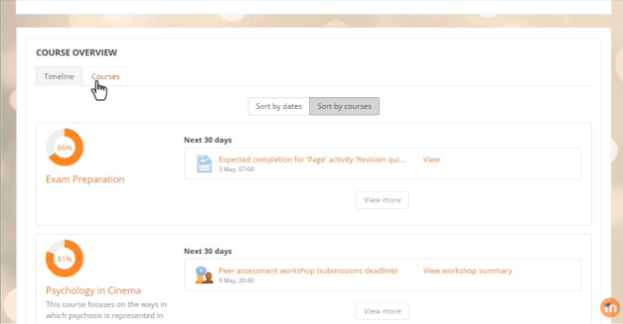
If a learner chooses to view the timeline by the courses tab they then have an overview of their current, past and future courses.
Course percentages can be displayed when educators use a Moodle feature called ‘activity completion’.
Dashboards can also be customised to suit a learner’s individual need!
Here’s how you can make it happen:
- Select the ‘customise this page’ button.
- Click ‘add a block’ and select what block you want.
- Drag and drop your chosen block to where you would like it to be placed on the page. Alternatively, click the crosshairs icon to select an area under which the block will reappear.
- To delete a block click the arrow, then ‘delete’.
- When you have made all the changes you want to, stop customising the dashboard by selecting ‘stop customising this page’.
Don’t forget if you change your mind about your customisations you can change your page back to default settings using the ‘reset page to default’ button.
Congratulations! You are now ready to set off on your Moodle journey.
For more information on the Moodle dashboard, watch the Learn Moodle video below, or check out the documentation on moodle.org.