Gapfill, Fill in the blank, Cloze tests – whatever you choose to call them – are a very useful question type where learners must complete a text which has missing information.
The best examples of this offer differentiation: learners may be required to add the information themselves from memory, or they may be given correct and incorrect alternatives from which to choose. And of course, as long as you tell Moodle the answers, Moodle will do your grading!
You can do this in standard Moodle by using the embedded answer (cloze) question type but to be honest, it’s not very easy to set up, particularly if you’re a busy teacher with no time to learn the code necessary to do them.
Enter Marcus Green, UK teacher and developer, who designed a much simpler version, the Gapfill plugin, allowing you to create quizzes with gap-fill questions in minutes!
How do I get Gapfill and why would I want it?
If the site allows, your admin can install the Gapfill question type from the install plugins page of site administration.
The Gapfill question type is regularly maintained by Marcus, a long-standing Moodler who maintains several other plugins too. Coming from both a teaching and a development background means that Marcus understands the constraints on teachers’ time and is able to provide solutions to it.
The best thing about this question type is that you don’t have to read a long page of documentation to be able to use it – although Marcus has helpfully provided one if you really want to! Check out the Gapfill question type documentation.
How do I use Gapfill?
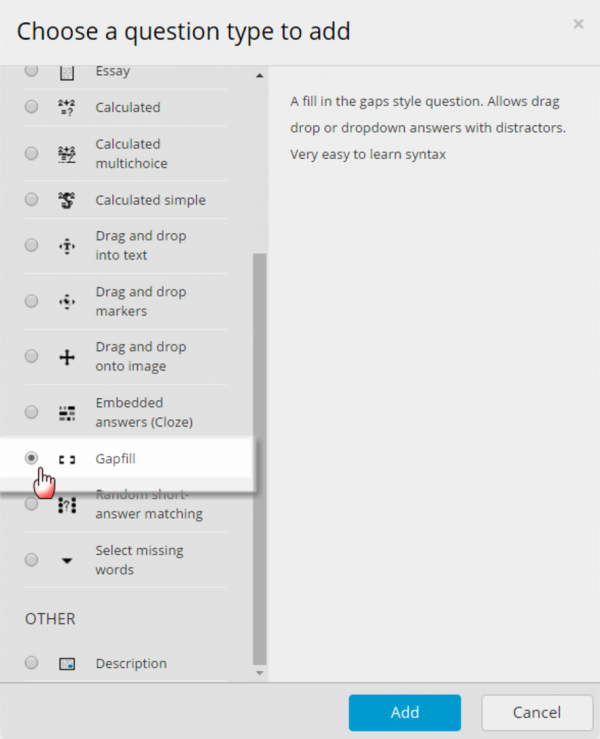
Once installed by your admin, the Gapfill question type appears as an option when you’re choosing question types for your quiz:
It’s worth noting in its description on the right, it specifies “very easy to learn syntax”. This is perfect for the keen but impatient!
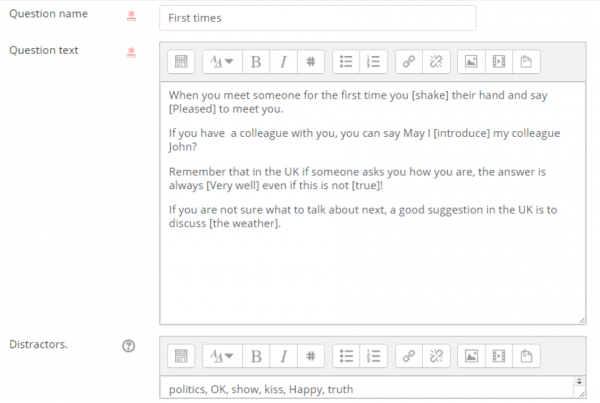
Once you’ve added it, you need to type in the text which will have the blanks/gaps.
This is where I had to click the “?” help icon to find out how to add the blanks. It only took me seconds to read the information and all I had to do was put square brackets around the items to be excluded. Again, when I didn’t know what ‘distractors’ were, the help icon put me right: they’re optional extra words to ‘distract’ learners from the correct answers!
Once you’ve done this, and if you are in a hurry, you are ready to save and go.
However, it’s worth exploring the “more links” settings too. There are a couple of options to tailor Gapfill to programming questions (very current), the option to ignore (or accept) duplicates and lower/upper case, and the option of choosing a fixed size for the gaps.
This means that the blanks for the missing words are all shown as the same length, giving away no clues! Once again, Marcus proves he has been a real teacher in a real classroom!
The Gapfill answers can be displayed in three different ways, let’s now check it out from the learners’ point of view.
What do students see?
- If the teacher selects “Gapfill” from the “more links” setting we mentioned before, then the question will look like this when students access it:
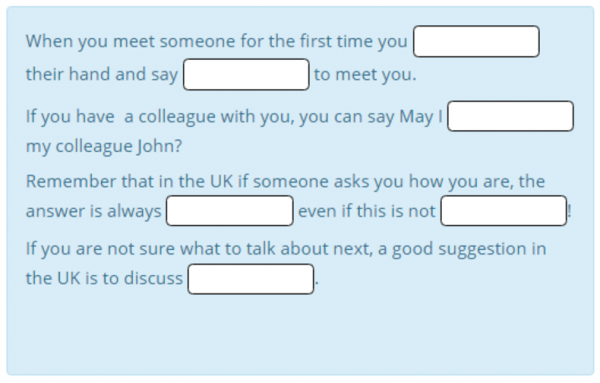
Note there are no answers! This is the hardest version, as learners will have to figure out what to type themselves! As we set a fixed gap, each answer shows as the same size!
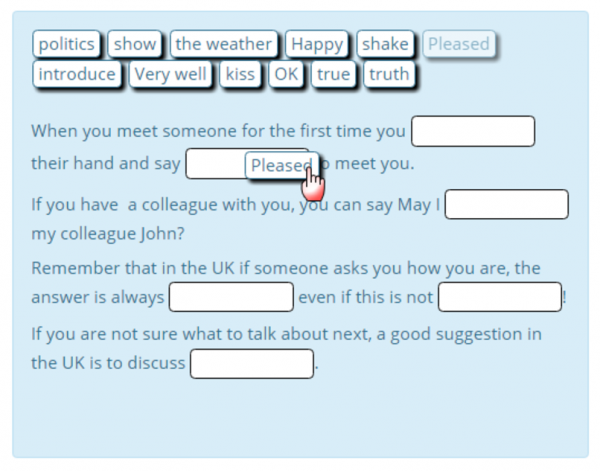
- If the teacher selects the “dragdrop” option, students can drag the words into the gaps. As we added ‘distractors’ it’s harder for our students, this is because there are more words than gaps. However, if you would like to set a different level for your students, you can leave out distractors.
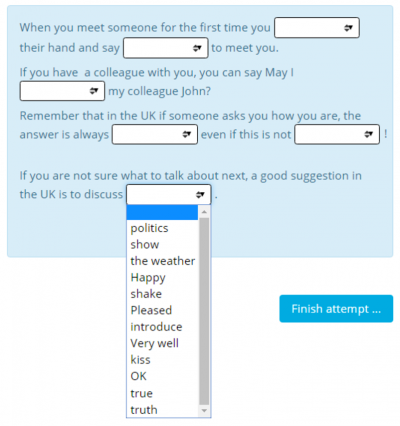
- Finally, if you prefer, the answers may be displayed in a list by selecting dropdown:
Summing up
- Questions, where learners must complete missing information, are a useful assessment feature in Moodle’s quiz.
- The Gapfill plugin by established community contributor and Moodler, Marcus Green, allows for the easy creation of cloze or fill in the blank question types, and offers various display and customisation options.
- As a plugin, it needs to be installed by an administrator. This is quickly done, but if you have any issues with this or would like further assistance, feel free to get in touch with one of our Moodle Partners.