Moodle Workplace makes it straightforward for administrators and managers to support different learning audiences by creating an ecosystem of individual learning environments in a single LMS site. Called multi-tenancy, this feature allows each site to have its own look and feel, user membership, administrators, and content, whilst also allowing sharing across tenants. Save time and create efficiencies by configuring one tenant for internal staff, while configuring additional tenants for channel partners and customers.
Creating tenants
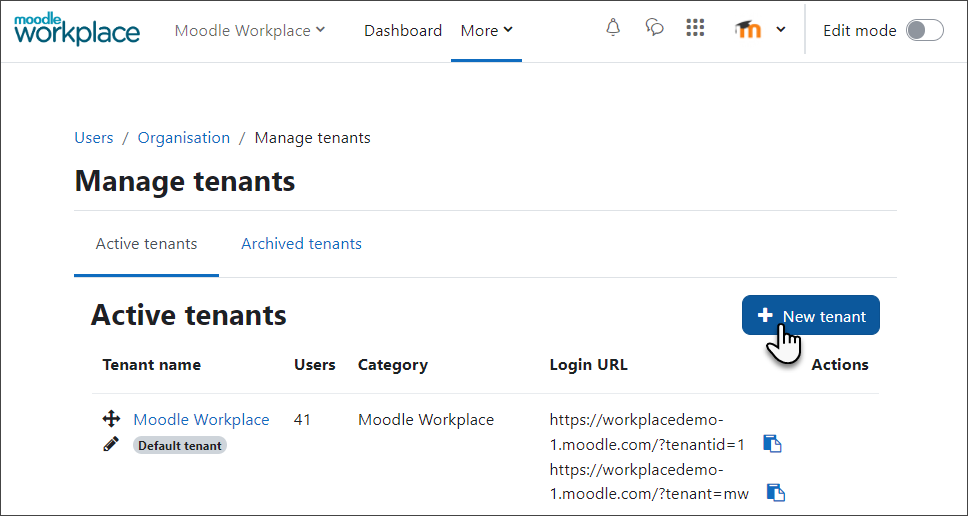
Workplace admins can toggle the Workplace launcher to the left of their profile. Hovering over it provides more options from which you can choose ‘All tenants’. Clicking on it displays active and archived tenants.
You’ll also see the ‘New Tenant’ button, which allows you to create a new tenant. When clicking on this option, you can optionally ask for the provision to automatically create a new category with the tenant name.
By choosing ‘Users’ you can only manage the users for that specific tenant. There is an option to upload them in bulk or add them manually from the ‘New user’ button. A tenant administrator can be assigned while creating a new user, or by editing the existing ones.
Going to the ‘Roles’ tab allows you to display and manage the roles for this tenant only.
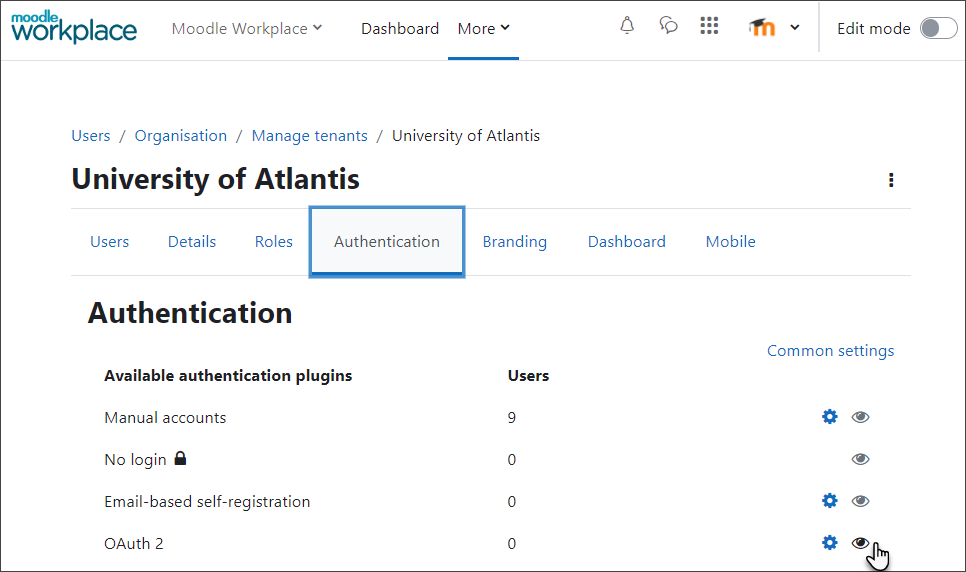
‘Authentication’ helps you define how learners will login to the site. The different methods for authentication are the ones enabled by the main Workplace administrator, and can be configured by the tenant administrator.
Adding branding
The ‘Branding’ feature allows the Workplace or tenant admins to upload logos and other visuals for the tenant. You can also specify the tenant accent colour, adding further customisations with CSS. There is a ‘Reset’ button that you can use to restore specific items to their accessible default configuration.
Each tenant has its own individual dashboard linked to the main sitewide dashboard by default, which can be further personalised.
By selecting the ‘Mobile’ tab, you can customise the settings specific for each tenant as the Workplace mobile application allows per tenant configuration.
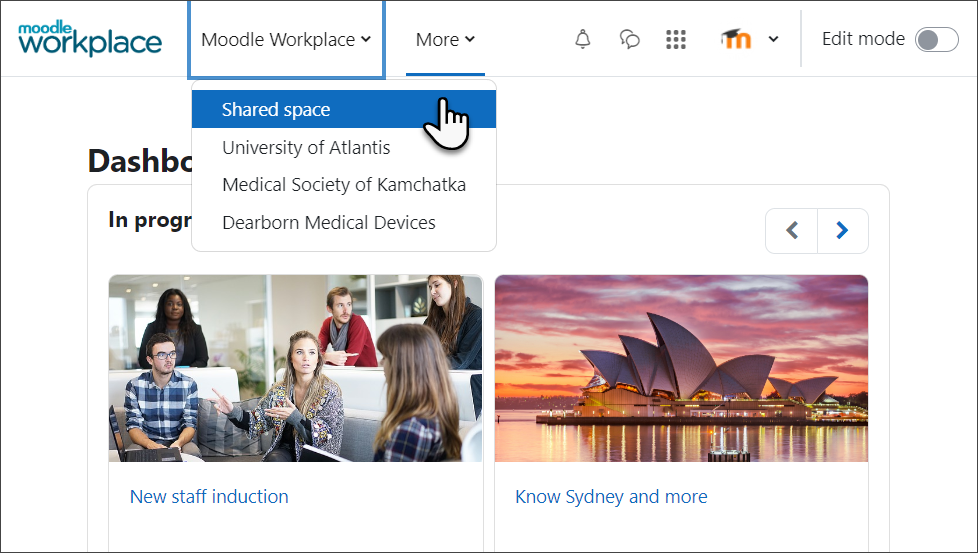
A ‘Shared space’ for all tenants
On the top left near the tenant logo, you can find the ‘Shared space’ feature if it is already enabled. Programs, dynamic rules, reports, and other things that are set up here are accessible to all tenants. For example, Moodle’s admin can create a shared report inside of this space that will be available to users in all tenants to avoid duplicatiоn of the same reports.
Tenant admins — tasks and responsibilities
After the tenant is set up, the tenant admin will be able to see and manage the following activities via a customised page. From the Workplace launcher on the top right, they can manage the branding and dashboard from the ‘Appearance’ tab and manage users, roles and authentication from the ‘User’ tab. The shared report (enabled by ‘Shared Space’) can be accessed from the ‘Custom reports’ icon.
You can learn more about creating and organising multiple learning platforms within a single LMS in this short video on Multi-tenancy, or access the Moodle Workplace documentation.