After introducing the essential content needed to create a good open educational resource on MoodleNet in our previous blog, we’ll continue our guide to explain the process of resource collections.
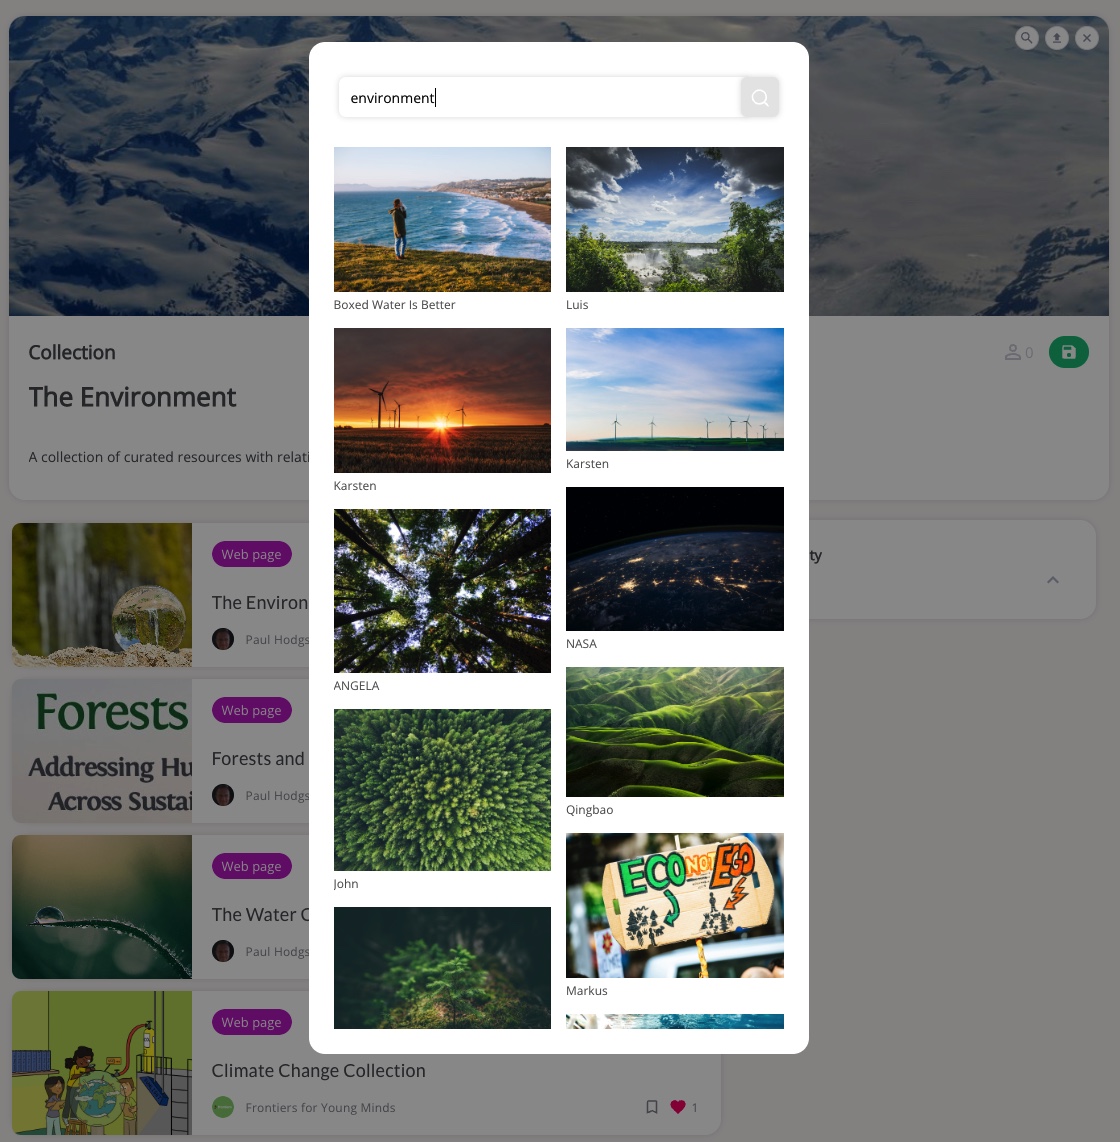
All resources can be added to collections by anyone with a moodle.net account. This allows anyone to create, curate and group the perfect collection of educational resources for others to follow.
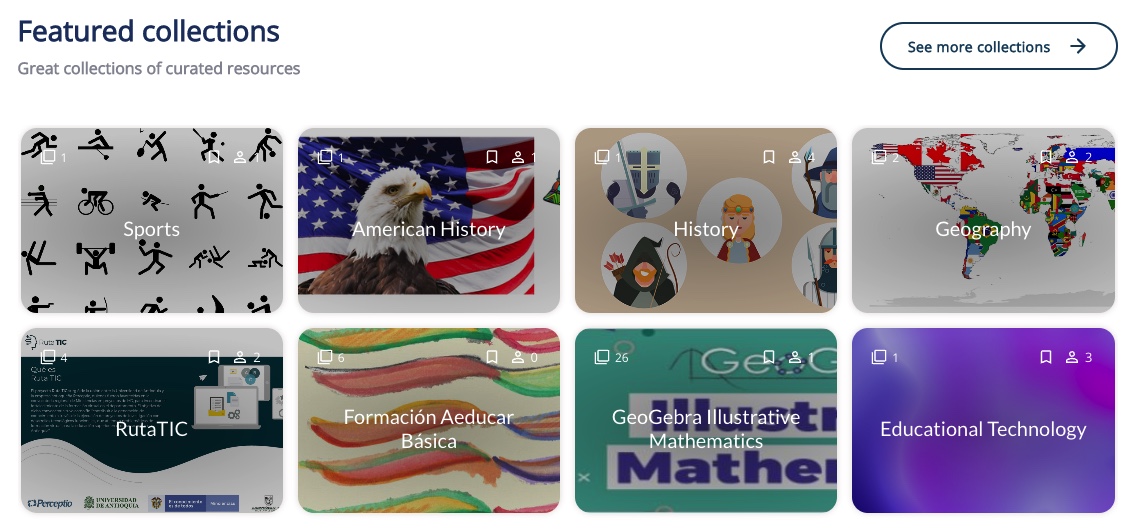
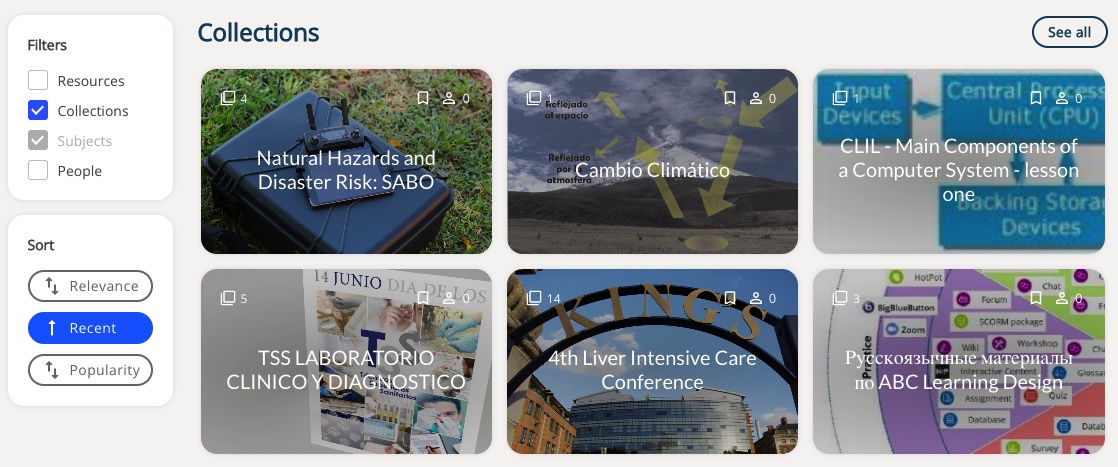
By following this guide when adding your collections, not only will your collections be found more easily and followed by more people, at MoodleNet we’ll look out for these when selecting resources to be featured on our front page.
Step 1: Upload a thumbnail image
The first item requested when you create a collection is to upload a thumbnail image. The thumbnail should be relevant and attractive as, together with the title, it has the most significant impact on the visual appeal of the collection.
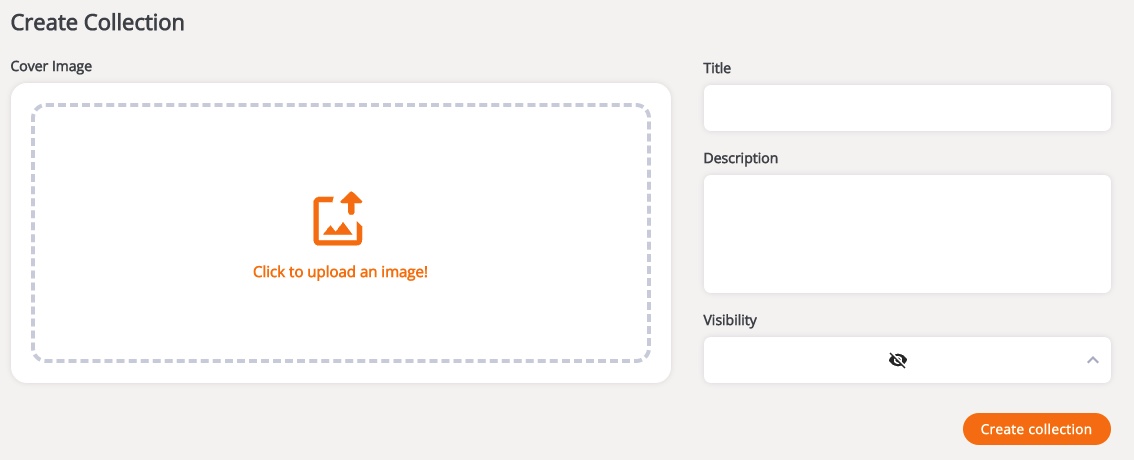
If you don’t have a suitable image, you can create the collection without one and return later to edit this thumbnail. You can use the integrated Unsplash image finder to include a high resolution, copyright and royalty-free image that is properly attributed to its author.
Step 2: Include your collection title
Adding a collection’s title is essential, as MoodleNet uses this to rank the search results according to relevance. It’s also the only text that’s visible on the search results page, so it’s the first thing people see along with the thumbnail image:
It’s tempting to add a title that doesn’t describe the collection, however, as the number of collections on MoodleNet grows, it is unlikely that anyone without a direct link to your collection will find it unless you describe the collection in detail.
Step 3: Don’t forget the description
The description of the collection is as important as the title for the MoodleNet search routine, so we recommend including key descriptive words that you haven’t included in the title.
The description appears underneath the resource thumbnail image when viewed. The best practise here is to use resources with a relevant, short description that explains the content of the collection.

Step 4: Set visibility
When you are ready for your collection to be made public so it can be found in search results, bookmarked and followed, don’t forget to ensure that visibility is set to public.
Step 5: Curate
You can add to your collection by selecting the “Add to Collection” button on any resource from any author or in the process of adding your own resources.